Wizard Workflows
A wizard workflow allows users to navigate through a series of steps or conditions to execute a workflow. Creating a wizard aims to divide a workflow into multiple screens and easily instruct the user on completing the workflow.
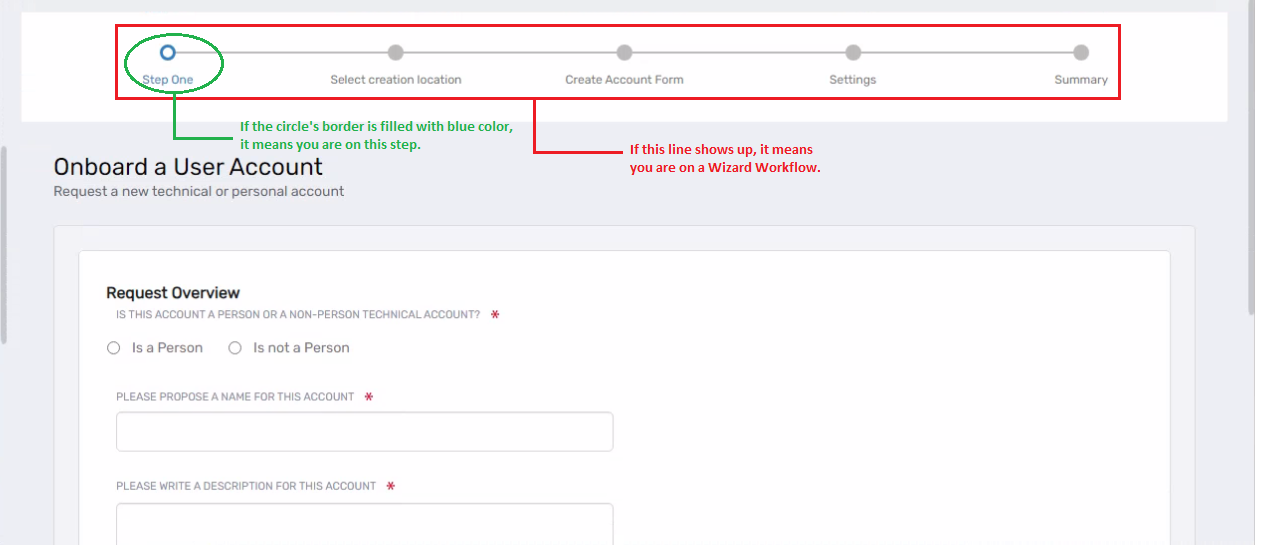
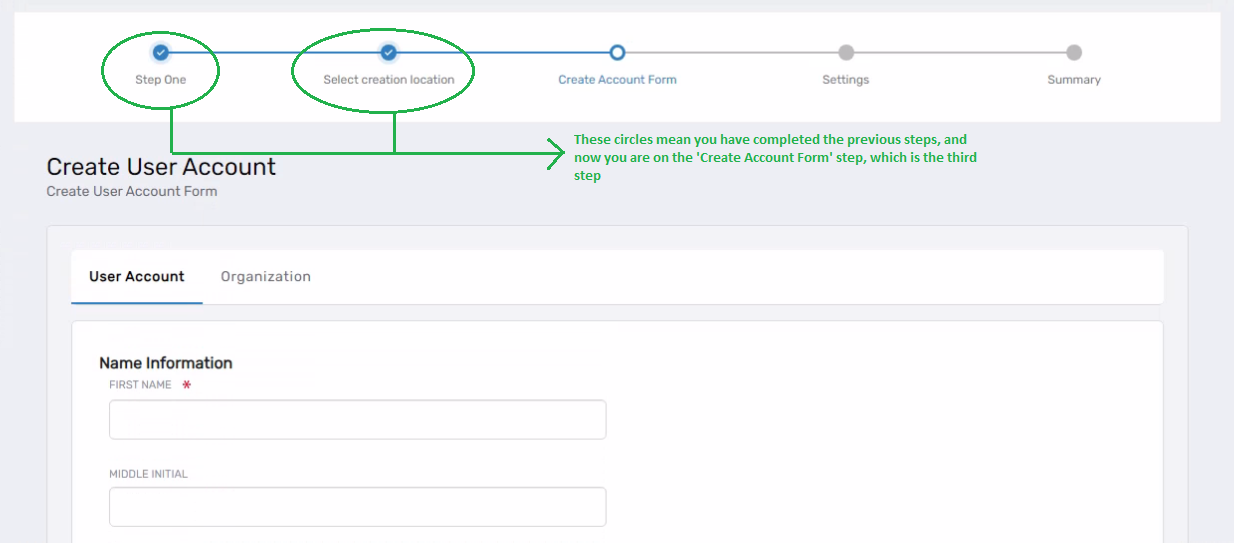
When running a workflow in the EmpowerID Web UI, you can determine whether it's a Wizard Workflow or a Simple Workflow by looking at the top of the interface. There, you'll find a line with circles, each circle representing a step in the workflow. If the circle's border is filled, it means you are currently on that step. If the circle itself is filled and displays a check icon, it means you have completed that step.
To transform your workflow into a Wizard Workflow, follow these steps:
- Enable the next and back buttons on your activities i.e., Forms, Lookups etc.
- In the BeforeExecute event of your first activity, write the following code. Alternatively, you can use the SetDataCode method of the activity instead of the BeforeExecute event handler.
Below, we have the code for converting our workflow into a wizard workflow (Assuming a three-step workflow). You will write the following code in the BeforeExecute event handler or in the SetDataCode method of the activity placed within your workflow.
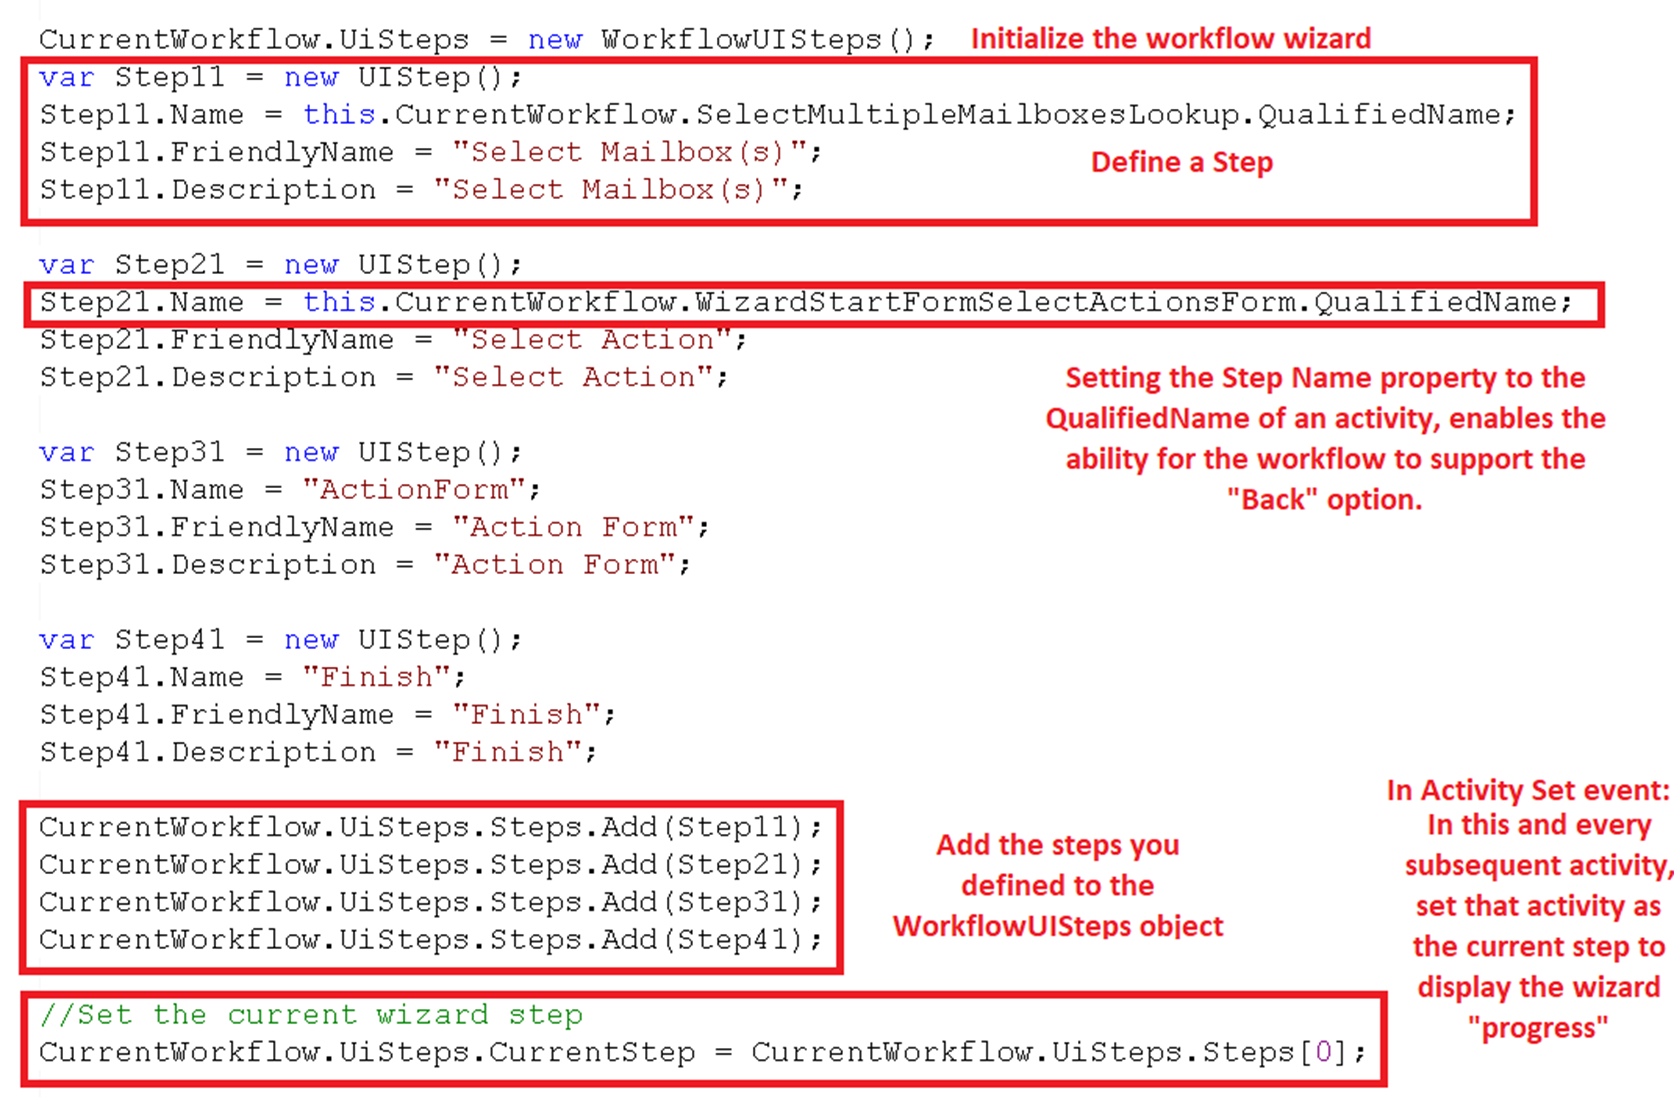
CurrentWorkflow.UiSteps = new WorkflowUISteps();
var step1 = new UIStep();
step1.Name = this.CurrentWorkflow.myNewWizardFormActivity1.QualifiedName;
step1.FriendlyName = "My First Step";
step1.Description = "My First Step";

var step2 = new UIStep();
step2.Name = this.CurrentWorkflow.myNewWizardFormActivity2.QualifiedName;
step2.FriendlyName = "My Second Step";
step2.Description = "My Second Step";

var step3 = new UIStep();
step3.Name = this.CurrentWorkflow.myNewWizardFormActivity3.QualifiedName;
step3.FriendlyName = "My Third Step";
step3.Description = "My Third Step";

CurrentWorkflow.UiSteps.Steps.Add(step1);
CurrentWorkflow.UiSteps.Steps.Add(step2);
CurrentWorkflow.UiSteps.Steps.Add(step3);

CurrentWorkflow.UiSteps.CurrentStep = CurrentWorkflow.UiSteps.Steps[0];
step1.Name = this.CurrentWorkflow.myNewWizardFormActivity1.QualifiedName;
The name we associate with this property is going to be the Qualified Name of the corresponding activity for that step. Behind the scenes, our workflow engines use this name to locate the activity.
step1.FriendlyName = "My First Step";
FriendlyName property will appear as the step name on the line. FriendlyName can also be localized.
CurrentWorkflow.UiSteps.CurrentStep = CurrentWorkflow.UiSteps.Steps[0];
Here on this line we are setting the current step. Passing 0 as an index means this activity is going to be our first step in the Wizard Workflow.
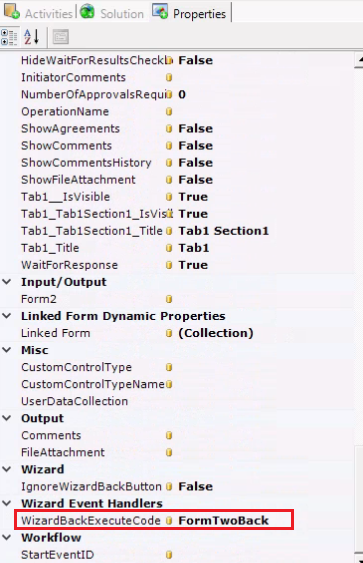
If you want to navigate from your last form back to your first form, you can achieve this by writing the following code in the BeforeExecute event handler class or, you can also write the same code in the WizardBackExecuteCode event handler class of the activity.
CurrentWorkflow.UiSteps.PreviousStep = CurrentWorkflow.UiSteps.Steps[0];
See below image for further explanation of what each line of code is doing.
Let’s consider an example where you are creating a Wizard Workflow that contains three forms. The following buttons should be enabled on each form accordingly:
| Form Name | Enabled Buttons |
|---|---|
| Form One | Next |
| Form Two | Back and Next |
| Form Three | Back and Submit (or just Submit, depending on your requirement) |